
How to Maintain Your Garage Door [Step by Step Guide]
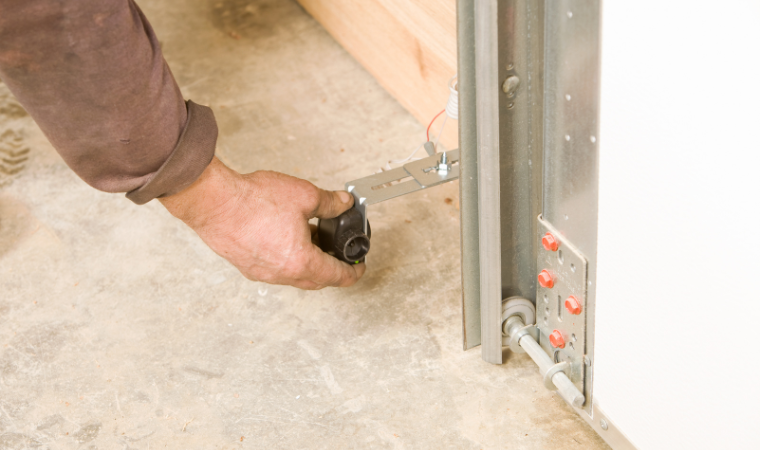
A garage door is one of the largest moving parts in a home, yet it often gets overlooked until something goes wrong. From our experience, most garage door issues do not start suddenly. They develop slowly due to wear, lack of lubrication, or small alignment changes that go unnoticed over time. That is why learning how to maintain your garage door properly can help extend its lifespan and reduce unexpected problems. This guide walks through simple, safe maintenance steps we commonly recommend to homeowners. These steps focus on observation, light care, and early detection rather than repairs that require specialized tools. How to Maintain Your Garage Door Step 1: Watch and Listen to the Door in Motion We always suggest starting with observation. Open and close the garage door a few times and pay attention to how it moves. Look for uneven movement, hesitation, or shaking. Listen for grinding, scraping, or popping sounds. A smooth door should move evenly and quietly. When we check doors that later develop issues, early signs such as noise or uneven travel are often the first clue that something is changing. If anything feels different from normal, note it before moving on. Step 2: Inspect the Visible Hardware Next, take a slow look at the door’s visible components. This includes rollers, hinges, tracks, and mounting brackets. You are not adjusting anything here, just checking. We often find loose screws, worn rollers, or slightly bent track sections during routine inspections. Look for rust, cracks, or parts that appear misaligned. If the hardware seems damaged or heavily worn, it is helpful to document it later. Avoid touching cables or springs. These parts are under tension and should only be handled by trained professionals. Step 3: Keep Tracks Clean and Clear One of the simplest ways to maintain your garage door is to keep the tracks clear. Dirt, leaves, and small debris can interfere with smooth movement. Use a dry cloth to wipe inside the tracks. If there is heavy buildup, a damp cloth works well, followed by drying. We do not recommend applying grease to the tracks themselves, as it can attract more debris and cause buildup over time. Step 4: Lubricate Moving Parts Properly Lubrication plays a big role in garage door longevity. Hinges, rollers with bearings, and springs benefit from proper lubrication. We suggest using a garage door-specific lubricant rather than general-purpose oils. Apply lightly and wipe away excess. Over-lubrication can cause dripping and dirt buildup. For general guidance on safe lubricant use and maintenance products, Consumer Reports offers helpful information on household lubrication basics. Step 5: Check Door Balance Safely Door balance affects both performance and safety. While we do not recommend adjusting springs, you can still observe balance. With the opener disengaged, carefully lift the door halfway and let go. A balanced door should stay in place. If it drops quickly or shoots upward, the balance may be off. When we encounter doors with an opener strain or uneven movement, imbalance is often the root cause. In that case, professional adjustment is usually needed. Step 6: Test Safety Features Garage door safety features are critical. Check the auto-reverse feature by placing a small, solid object, such as a block of wood, on the floor beneath the door, then closing the door to see if it reverses on contact. The door should reverse upon contact. Also, check the safety sensors near the floor. Make sure they are clean, aligned, and unobstructed. We found that dirty or misaligned sensors are among the most common causes of door reversal. Step 7: Inspect Weather Seals and Panels Weather seals help keep moisture, debris, and pests out of the garage. Check the bottom seal and side seals for cracking or gaps. Door panels should also be inspected for dents, warping, or separation. Even minor panel damage can affect weight distribution over time. Step 8: Maintain the Opener System The opener is part of the overall system. Check the mounting bracket, rail, and chain or belt for wear. We recommend listening for changes in motor noise and ensuring the opener does not strain when lifting the door. If the opener struggles, it often means the door itself needs attention. When to Involve a Professional That said, not every maintenance issue should be handled by a homeowner. If you notice cable slack, spring issues, significant imbalance, or repeated operational problems, we recommend contacting a trained garage door professional. These components store energy and require appropriate tools and experience. From what we have seen, early professional evaluation often prevents larger failures and extends the system’s lifespan. How Often to Maintain Your Garage Door We generally suggest light checks every few months and a more thorough inspection at least once a year. Seasonal changes are a good reminder to revisit your garage door maintenance and catch issues early. Final Thoughts Knowing how to maintain your garage door is not about fixing everything yourself. It is about understanding what normal operation looks like and recognizing when something changes. Regular observation, basic cleaning, and proper lubrication reduce wear and help the system work as intended. In our experience, doors that receive consistent care tend to last longer, operate more smoothly, and avoid sudden breakdowns. Paying attention now saves time, cost, and frustration later.
Resetting a Garage Door Keypad or Code After Battery Change
Changing the batteries in a garage door keypad is usually simple, but many homeowners notice that the keypad stops working right afterward. We have seen this happen because some keypads lose their stored code when power is interrupted. In other cases, the keypad powers on but no longer communicates properly with the opener. In these situations, the issue is usually not the keypad itself but the need for a reset. We recommend understanding how resetting works and when it is required, since it can save time and avoid confusion, especially when a door suddenly stops responding after a battery replacement. Why a Garage Door Keypad May Stop Working After a Battery Change A garage door keypad relies on a small internal memory to store its access code. When batteries are removed, that memory can reset, depending on the keypad model. Even if the code is not erased, the keypad may need to be reconnected or resynchronized with the opener to function properly again. Common reasons include: • Complete power loss during battery removal• Weak or incorrect batteries installed• Keypad timing out during the change• Loss of connection between keypad and opener When this happens, resetting garage code settings is often the next step. Signs That a Reset Is Needed You may need to reset the keypad when it lights up, but the garage door does not respond, even though the system has power. Another common sign is when a code that worked previously no longer opens the door, or the keypad begins flashing or beeping without activating the opener. In some cases, the door will still open with a remote but not with the keypad. These situations usually indicate that the keypad needs to be reprogrammed rather than pointing to a mechanical issue with the door itself. How to Reset Garage Door Keypad After Changing Battery The general reset process is similar across most brands, though the exact steps vary by model. In simple terms, resetting involves clearing the old code and programming a new one so the keypad and opener can communicate again. Most resets include these steps: Once complete, the opener stores the new code and responds to the keypad. If the keypad still does not work, repeating the process slowly often helps, as timing is critical. Resetting Garage Code vs Changing Batteries Changing batteries restores power, but resetting the garage code restores communication. These are two separate steps. A keypad with fresh batteries can still fail to open the door if the code is no longer synced with the opener. That is why many issues appear immediately after a battery change, even though the keypad itself seems fine. For general information on battery types and safe handling, see the Consumer Reports battery basics guide. Common Mistakes During Resetting Homeowners often run into problems when: • Batteries are installed backward• The wrong type of batteries is used• The learn button is held too long• The code is entered too slowly• The keypad buttons are pressed before the opener is ready Taking a moment to reset carefully and follow timing instructions usually prevents these issues. When Resetting Does Not Solve the Problem If resetting the garage code does not restore keypad functionality, the issue may be related to the keypad or the opener system, rather than the batteries. This can occur when a keypad has reached the end of its usable lifespan, when signal interference between the keypad and the opener occurs, or when internal buttons wear over time. In some cases, the problem may involve the opener’s logic board. At that stage, professional evaluation helps determine whether the keypad needs to be replaced or if the opener requires further attention. Tips to Avoid Keypad Issues After Battery Changes To reduce the risk of keypad issues after future battery changes, replace batteries one at a time when possible and always use fresh, high-quality batteries. Avoid pressing keys while installing the batteries, and keep the keypad clean and dry to prevent moisture and dirt from affecting performance. Writing down the current code before changing batteries can also prevent confusion later. These simple habits reduce the risk of losing keypad settings. Frequently Asked Questions 1. Why did my garage keypad stop working after changing batteries? Some keypads lose their stored code when power is interrupted, requiring a reset of the garage code settings. 2. Do I always need to reset after a battery change? Not always. Some models retain the code, but many require a reset. 3. Can I reuse the same code? Yes. Most systems allow you to re-enter the same code during reset. 4. How often should keypad batteries be replaced? Most batteries last one to two years, depending on usage and climate. 5. Will resetting the keypad affect remotes? In most cases, resetting the keypad alone does not erase remote controls, but this depends on the opener model. Final Thoughts A garage door keypad that stops working after a battery change is usually due to a lost or unsynchronized code rather than a serious system failure. Understanding how to reset the garage code makes it easier to regain access without unnecessary frustration. If the keypad continues to fail after a proper reset, it is often a sign that the keypad or opener requires closer inspection by a trained technician.
Faux Wood Garage Door Panels: Cost, Durability, and Installation
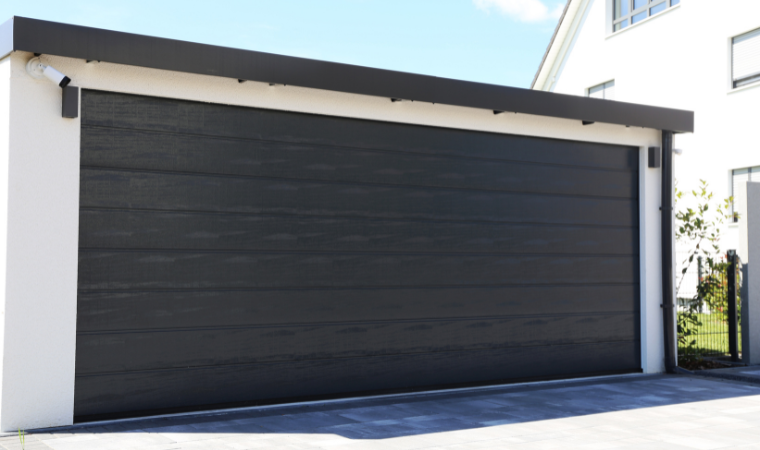
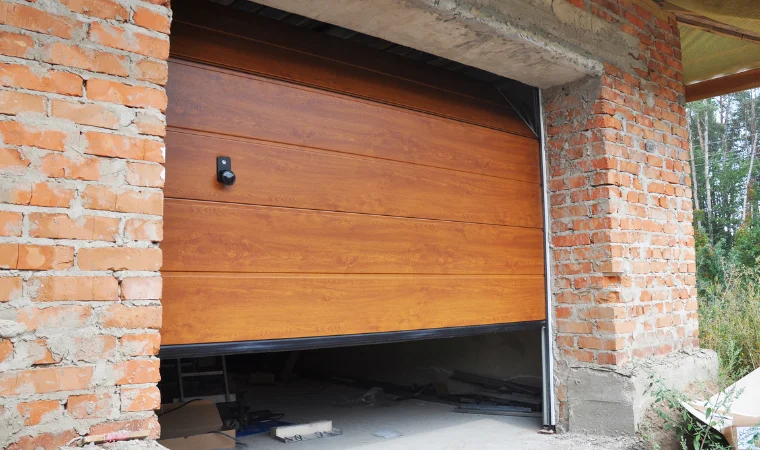
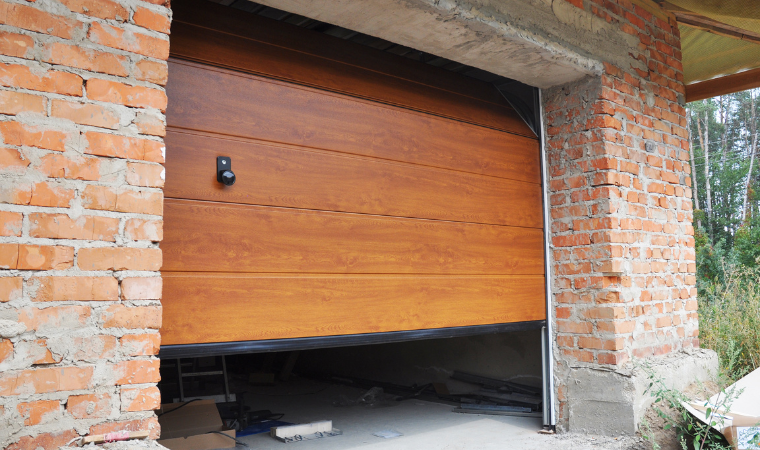
Faux wood garage door panels are increasingly favored by homeowners seeking the aesthetic appeal of real wood, along with reduced maintenance requirements. These panels are designed to look like authentic cedar, oak, or mahogany, yet they resist moisture, peeling, and warping much better than traditional wood. Because they offer visual appeal and long-lasting performance, they work well for both new garage doors and replacement upgrades. What Faux Wood Garage Door Panels Are Faux wood garage door panels are typically made from steel, composite, fiberglass, or a combination of materials. A realistic wood grain texture is molded or embossed into the surface, giving the door a natural look from a distance and up close. The goal is to recreate the charm of wood while keeping the structure light, durable, and easy to maintain. Many homeowners choose faux wood panels because they do not require staining, sealing, or sanding over time. They hold their color well and do not fade as quickly as real wood exposed to sunlight and weather. For homeowners who want to understand how different garage door materials compare in terms of durability and performance, the International Door Association offers a helpful overview on its official materials page. Benefits of Faux Wood Garage Door Panels 1. Lower Maintenance Real wood is beautiful but requires regular sealing and care. Faux wood garage door panels keep the same warm appearance with far less upkeep. 2. Strong Weather Resistance Composite and steel-based panels resist moisture, rain, and humidity. They also do not crack or warp, which helps the door last longer. 3. Lightweight Construction The lighter weight reduces strain on springs and hardware. This can help extend the life of the garage door system. 4. Versatile Design Options Faux wood colors range from light natural tones to deep, rich finishes. Panels also come in raised, recessed, or carriage style designs. 5. Better Long-Term Durability Because the panels are not affected by insects or rot, they stay in good condition even in climates with heavy rain or temperature fluctuations. How Much Faux Wood Garage Door Panels Cost The price varies by material and style. On average, homeowners can expect faux wood garage door panels to cost between 800 and 1500 dollars for a standard single door, depending on brand, thickness, and finish level. Full custom designs or insulated models cost more, but the overall maintenance savings usually balance it out. Durability and How Long They Last Faux wood panels are designed to handle daily wear without losing their shape or texture. Steel based panels are the strongest option, while composite and fiberglass provide a lighter feel with strong impact resistance. Many of these panels last more than fifteen years when maintained properly. The finish is designed to resist fading from UV exposure, and the molded grain pattern stays consistent over time. Even in areas with strong sunlight or frequent rain, the panels tend to hold up better than natural wood. Installation Process Explained Installing faux wood garage door panels is similar to installing standard steel or composite sections. The process usually includes: • Removing the old door sections• Securing the new panels to the existing or new hardware• Aligning the tracks and rollers• Balancing the door for smooth movement• Testing the opener to confirm proper operation Because the panels are lighter than solid wood alternatives, installation is often quicker and places less strain on the system. Most homeowners prefer a trained technician to handle the setup since it involves springs, cables, and alignment steps that require experience. When Faux Wood Garage Door Panels Are a Good Choice Faux wood is a strong option for homeowners who: • Want the look of natural wood without heavy upkeep• Live in climates with high humidity, rainfall, or heat• Prefer long-lasting materials that stay stable over time• Want a lightweight door that reduces strain on the opener• Like the appearance of carriage house or craftsman style designs Whether for a complete door replacement or a design refresh, faux wood garage door panels offer a clean, durable finish that complements many home styles. Frequently Asked Questions Do faux wood garage door panels look real? Yes. Modern finishes use molded grain patterns that closely match the look of natural wood. Are they heavier than steel doors? Many models are similar in weight or lighter, depending on the construction. Can they be insulated? Yes. Insulated versions are available for better temperature control and quieter operation. Do they fade in sunlight? They hold color well, but slight fading over many years is typical. The effect is still less than that of natural wood. Can I replace just one panel? In many cases, yes, as long as the new panel matches the size and style of the existing door. Final Thoughts Faux wood garage door panels offer a stylish, practical alternative to real wood. They provide long-lasting durability, reduced maintenance, and a realistic appearance that fits both modern and traditional homes. With a wide range of textures and colors, they allow homeowners to enjoy the look of a custom wood door without the upkeep or weight concerns.
Why Your Garage Door Is Closing Crooked, or One Side Is Higher [Fixes Included]
A garage door should move evenly from top to bottom. When it tilts, leans, scrapes, or closes unevenly, something in the system is no longer working together. Many homeowners first notice the problem when the bottom seal touches the floor on one side, leaving a gap on the other. Others hear a new grinding sound or see the door dropping faster on one side. A crooked garage door may seem like a minor inconvenience, but it often signals hidden strain on cables, springs, rollers, or tracks. Understanding why the imbalance happens helps you recognize what is normal and what may need attention from a trained technician. We’ve explained here the most common causes of a crooked garage door, symptoms to watch for, safe homeowner observations, and when expert help is recommended. What It Means When a Garage Door Closes Crooked When a garage door closes crookedly, one side moves at a different pace than the other. The result is a slanted or uneven finish where the door meets the ground. Homeowners often describe it as: • Garage door closing crooked• One side of the garage door is higher than the other• The door looks twisted or uneven while lowering• Door scrapes or leans during movement This usually means that the mechanism controlling the door’s balance is loose, damaged, or worn. How a Garage Door Moves as a Balanced System A garage door weighs more than it appears. Most residential doors weigh between 120 and 300 pounds. Springs carry most of that weight, so the opener does not struggle. Cables lift and lower the door. Rollers guide the movement along the tracks and keep it straight. When all of these parts share weight evenly, the door moves smoothly. If one part weakens or shifts, the door tries to work harder on one side, which creates a crooked close or uneven opening. For a deeper understanding of the safety standards behind garage door operation, you can review the UL safety guidelines. Why Your Garage Door Is Closing Unevenly Below are the most common reasons a garage door becomes crooked or one side sits higher. Cables carry the door’s load. If a cable frays, loosens, slips off the drum, or begins to stretch, one side will drop faster than the other. You may even notice slack in a cable. Torsion and extension springs balance the entire door. If a spring loses tension or only one spring is replaced, the door may pull unevenly. Rollers keep the door centered in the tracks. A cracked, seized, or missing roller can cause the door to tilt and force it to travel unevenly. Tracks guide the movement. If a track is bumped, bent, or loosened, the door may lean toward that side during closing. Small objects like gravel, kids’ toys, leaves, or tools can shift the door off balance while lowering. If the door gets hit or dented, the weight distribution changes, which can cause an uneven close. Vibration, weather, and age can loosen hinges, brackets, or screws, affecting how the door hangs. What Homeowners Often Notice First • Bottom rubber seal touches the floor on only one side• Door rubs, screeches, or drags during closing• Gaps appear under the door on one side• Door hesitates or jerks before fully closing• Opener strains, slows, or reverses unexpectedly• Door looks straight when open but crooked when closing Any of these signs can mean the door is no longer balanced. Why a Crooked Garage Door Should Not Be Ignored A crooked garage door may still open and close, but the imbalance behind it usually gets worse with continued use. An uneven door puts extra wear on cables and rollers and increases strain on the opener as it tries to pull more weight on one side. Over time, this can lead to bent tracks, metal fatigue, or a sudden cable failure. It also creates a safety concern for people, vehicles, and pets who pass under the door. In many cases, a crooked door is the first sign of a larger issue developing in the system. Simple Observations Homeowners Can Safely Make You do not need tools for these checks: • Stand back and watch the door close from a distance• Look for gaps under the door• Check whether one cable looks looser than the other• Look for visible dents, bent tracks, or debris• Listen for scraping, rubbing, or grinding sounds• Notice whether the door slows at a certain point If anything looks out of place, avoid touching springs, cables, or tension components. These parts are under high pressure and require professional handling. Possible Fixes for a Garage Door Closing Crooked If something is sitting against the track or wheels, clearing the area may help the door close, usually. Sometimes the door needs a reset after a power outage or disruption. Running a full open-and-close cycle can restore normal movement. If the door leans, drops unevenly, or has cable or spring tension issues, trained technicians typically handle the correction safely. A professional may recommend replacing rollers, realigning the track, or tightening hardware if components are worn or shifting. These solutions help prevent deeper mechanical strain. Why Do Doors Become Uneven Suddenly A garage door can become crooked without warning. Common triggers include: • Seasonal humidity swelling wood framing• Vehicle bumping the track• Sudden cable slip or break• Power outage followed by opener reset• Only one spring is being replaced instead of both• Long periods without maintenance or lubrication Even if the change seems minor, it can affect the door’s balance. How Door Type Influences Uneven Movement More likely to become uneven if the spring weakens. Offer better balance, but uneven wear can still appear. A heavier weight can exaggerate crooked closing. It may shift or loosen after years of use. Preventing a Crooked Garage Door in the Future You can help prevent a crooked or uneven garage door by keeping the floor area near the tracks clear and by making sure heavy items are not stored near moving parts. It
Garage Door Sensor Light Colors Guide
Garage door sensors use light signals to show whether the safety system is working as it should. These colors help homeowners determine whether the sensors are powered, aligned, or detecting a problem with the beam. Since every brand uses slightly different indicators, the colors sometimes create confusion. This guide brings everything together so you can understand what the lights usually mean without diving into repairs or adjustments that require technical service. For you, we’ve covered all sensor light colors in one place. It also includes color variations for Chamberlain, LiftMaster, and Craftsman to avoid the need for separate posts or overlapping content. What Garage Door Sensor Light Colors Represent Most garage door sensors come with two small lights. One sends an infrared beam, and the other receives it. When the beam is precise and the sensors are facing each other, the lights show a steady signal. When something interrupts that signal, the colors or blinking patterns change. Although every manufacturer has its own style, these color patterns usually follow similar logic. A steady light often means the sensor is active. A blinking or unusual color frequently suggests that the beam is blocked or that the sensors are not communicating correctly. You can also review the UL safety standards for garage door operator systems, which outline how these sensors are designed to support safe operation. Common Garage Door Sensor Light Colors and What They Usually Indicate Green Light A green light is often the power indicator. This means the sensor has electricity and is switched on. If the green light flickers or blinks, it may be reacting to changes in alignment or shadows near the beam. Red Light A red light is usually the receiving sensor. When the beam is precise, it stays solid. If the red light flickers, the beam may be blocked, or the sensors may not be facing each other properly. Amber or Yellow Light An amber or yellow light often appears on sensors that use a warm colored receiving indicator. This color can also occur when the sensor is powered but not fully aligned. Some brands use yellow to show the sending eye. Orange Light Orange is another version of the sending eye indicator. It may also appear if the sensor housing has an older lens that produces a warmer tone. If the orange light stays solid, it usually means the sensor is active. If it flickers, the beam may be losing connection. Flashing Green Light A blinking green light can point to alignment changes, movement around the bracket, or inconsistent power. Some models blink green during testing and return to solid green once the beam is stable. One Green and One Yellow This combination is common. It usually means one sensor is the sending eye while the other is the receiving eye. If the yellow or amber light blinks, it may not be reading the beam correctly. If both lights are solid, the system is typically functioning as intended. Why These Light Variations Occur 1. Sensor Misalignment Even small movements can shift the sensors enough for the beam to lose accuracy. This may happen when children play near the garage door, when items bump the brackets, or when seasonal temperature changes cause slight warping. 2. Dust or Debris on the Lens Sensors are close to the floor, where dust, leaves, pet hair, and moisture can collect. Any buildup on the lens can weaken the light signal. 3. Sunlight or Shadows Strong sunlight entering the sensor lens directly can interfere with the beam. Shadows from parked cars, boxes, or yard items can also interrupt the line of sight. 4. Vibration or Loose Mounting Regular opening and closing of the garage door causes vibration. Over time, the brackets may loosen slightly, affecting sensor alignment. 5. Aging Sensors Older sensors may become sensitive to small changes. Light colors may flicker or shift even when the door seems to operate normally. Brand Specific Light Color Behavior Every brand has its own light color style. Below are common patterns seen in the three leading brands found in many homes. These points are informational and do not include repair steps. Chamberlain Garage Door Sensor Light Colors Chamberlain garage door sensor blinking green A blinking green light often means the sensor is active but not yet reading the opposite sensor clearly. Chamberlain garage door sensor orange light An orange sending light is typical. It stays steady when powered. Chamberlain garage door sensor yellow A yellow or amber receiving light may appear when the beam is not entirely stable or when the sensor is picking up light interference. LiftMaster Garage Door Sensor Light Colors LiftMaster garage door opener sensor is yellow Some LiftMaster models use yellow to indicate the sending eye. A solid yellow light usually means the sensor is powered. LiftMaster garage door sensor blinking green light A blinking green signal may appear during alignment changes or when the beam is interrupted. Craftsman Garage Door Sensor Light Colors Craftsman garage door sensor orange light The orange light is often on the sending side. This color is standard. Craftsman garage door sensor yellow light A yellow receiving light may appear when the system is active, but the beam is not yet perfectly aligned. Situations Where Light Colors Change but the Door Still Works Some color shifts do not immediately affect the door. For example: • Minor dust on the lens• Temporary shadows• Strong sunlight hitting the lens• Small vibration at the bracket• Normal blinking during system startup If the door continues to work as usual, these light changes may be the sensor reacting to environmental conditions. When Light Colors Suggest Aging Equipment Sensors that show inconsistent or unpredictable colors, even when the door works, may be older. Over time, the internal components become sensitive. Homeowners often first notice this when the lights change shades or blink without an apparent reason. This does not always mean failure. It may indicate that the sensors are approaching the end of their lifespan. Simple Ways to Observe
Choosing the Right Garage Door
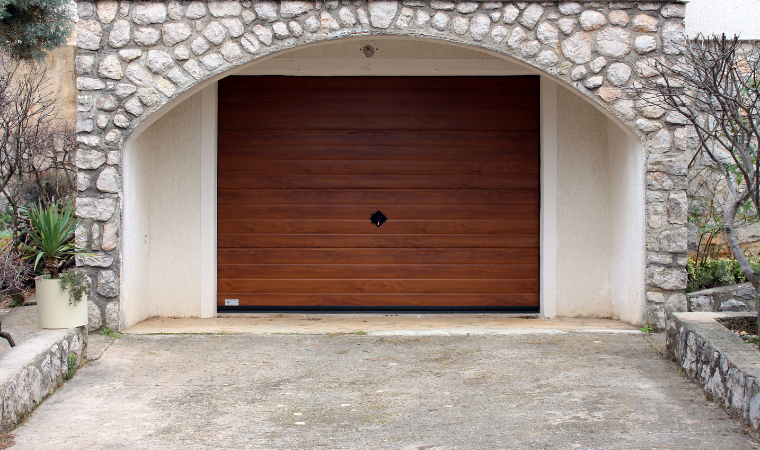
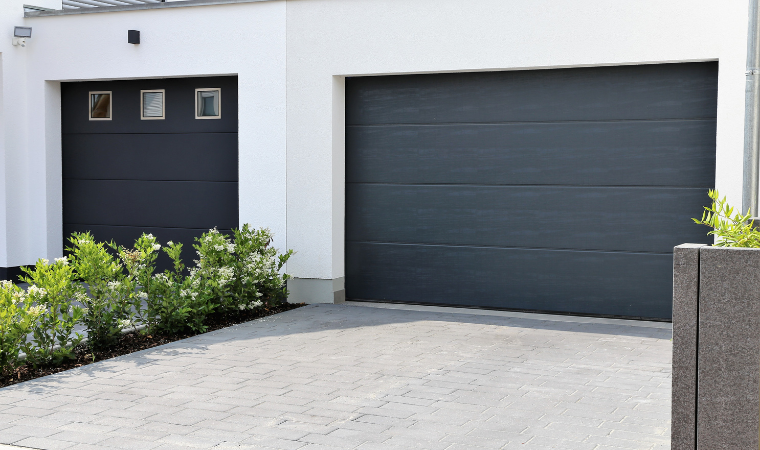
Your garage door is more than just an entry point—it’s a key part of your home’s exterior, security, and energy efficiency. Whether you’re replacing an aging door or selecting one for a new construction, the choice you make will impact curb appeal, performance, and comfort for years to come. With so many options available, understanding the differences in materials, styles, and insulation can help you make a smart investment. This guide breaks down everything you need to know when choosing the perfect garage door. 1. Garage Door Materials: Pros and Cons Steel Steel is a popular choice for its durability, affordability, and low maintenance, making it suitable for most homes. It comes in various styles, can be insulated for energy efficiency, and resists warping. However, it’s prone to denting and may rust over time if not properly finished or maintained. Wood Wood garage doors offer natural beauty, customization options, and timeless charm, particularly for traditional or craftsman-style homes. On the downside, they require frequent maintenance to protect against rot, moisture, and warping, and they tend to be more expensive than other materials. Aluminum Aluminum doors are lightweight, rust-resistant, and ideal for modern home designs, especially when paired with glass panels. While they perform well in humid climates, they’re more susceptible to dents and don’t offer the same insulation or strength as steel. Vinyl Vinyl doors are dent-resistant, durable, and nearly maintenance-free, making them a practical option for busy households or coastal environments. Their drawbacks include limited color and style options, and in very cold climates, the material can become brittle over time. Fiberglass Fiberglass mimics the look of wood and is resistant to moisture and insects, offering a lightweight and low-maintenance alternative. However, it may fade with prolonged sun exposure and can crack in extremely cold weather, making it less suitable for all climates. 2. Garage Door Styles Your garage door should complement your home’s architectural style while fitting your personal taste. Common styles include: Traditional Raised Panel Classic, rectangular panels fit a variety of homes from suburban to colonial designs. Carriage House With a barn-style appearance and often featuring decorative hardware, these doors suit rustic or country homes. Though they appear to swing out, they function like overhead doors. Modern/Contemporary Characterized by clean lines, large glass inserts, and minimalist finishes. Ideal for mid-century or modern homes. Custom Designs Some homeowners opt for fully custom garage doors using mixed materials and personalized features for a unique look. Local experts, like Fairway Garage Door Chicago, can help homeowners design custom doors that balance beauty with function. 3. Understanding Insulation Insulated garage doors are essential for temperature control and energy efficiency—especially if your garage is attached to your home. Types of Insulation What is R-Value? The R-value measures thermal resistance. A higher R-value means better insulation. If your garage is climate-sensitive or used as a workspace, look for doors with R-values of R-10 or higher. Benefits of Insulated Doors 4. Extra Features to Consider Windows Windows improve aesthetics and bring in natural light. Choose insulated or frosted glass for privacy and thermal performance. Smart Technology Modern garage door openers offer smartphone control, real-time alerts, and integration with home automation systems. Security Look for doors with reinforced locking mechanisms, tamper-resistant brackets, and openers with rolling code technology for better protection. Color and Finish Options From bold blacks and wood-tone finishes to neutral whites and grays, garage doors come in a wide array of colors. Many materials also offer texture options, like faux wood grain on steel or vinyl. Making the Right Decision Before purchasing a garage door, consider: If you’re unsure, consult a garage door professional to guide you through the process. A well-chosen door not only functions better but also significantly boosts curb appeal. Conclusion Choosing the right garage door involves balancing aesthetics, durability, energy efficiency, and cost. By understanding the different materials, styles, and insulation types, you can select a door that enhances both the look and performance of your home. Investing in a quality garage door improves comfort, lowers energy costs, and adds value to your property. And if you’re in need of expert guidance, reliable installation, or custom options, Fairway Garage Door is a trusted resource ready to help bring your vision to life.
Is It Time to Upgrade to a Smart Garage Door?
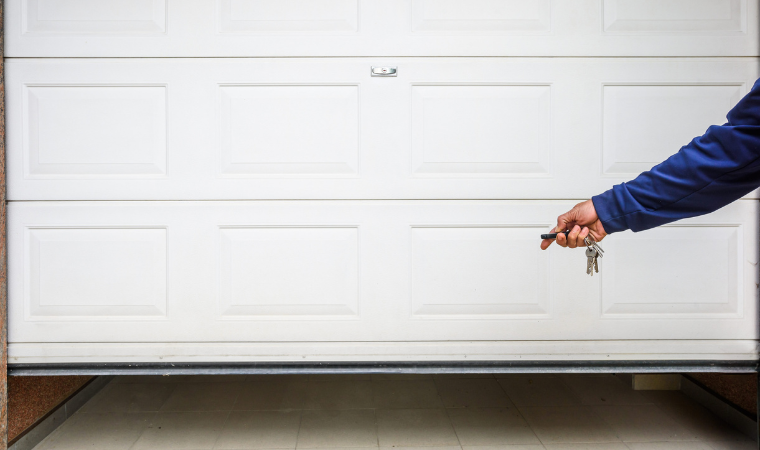
Gone are the days when garage doors were simple manual systems with a basic opener. Today’s homeowners expect more—smart garage door technology is rapidly becoming the standard, offering greater convenience, improved safety, and seamless control right from your smartphone. Whether you’re upgrading an old system or outfitting a new home, integrating smart technology into your garage door can make daily life easier while enhancing your home’s security. Here’s everything you need to know about how smart garage doors work, their features, benefits, and why more homeowners are making the switch. What Is a Smart Garage Door? A smart garage door is equipped with Wi-Fi-enabled technology that allows you to operate and monitor your garage door remotely using a smartphone app. This system typically includes a smart opener or a smart controller, which connects to your home network and offers features beyond just open and close functionality. Unlike traditional openers, smart garage doors give you real-time alerts, voice control, scheduling options, and even video monitoring—depending on the model and setup. Top Features of Smart Garage Doors 1. Remote Access and Control One of the biggest advantages is the ability to open or close your garage door from anywhere using a mobile app. Whether you’re at work, on vacation, or in bed, you can check the door’s status and control it with a single tap. 2. Real-Time Alerts and Notifications Smart garage systems send instant alerts if your garage door is left open for too long or if it’s opened unexpectedly. This helps prevent accidental security breaches and ensures peace of mind when you’re away from home. 3. Integration with Smart Home Systems Modern garage doors can be integrated with platforms like Google Assistant, Amazon Alexa, Apple HomeKit, or SmartThings. This allows for voice-activated control and automation, such as automatically closing the garage at a certain time or when you leave the house. 4. Guest Access Management Many smart apps allow you to grant temporary or recurring access to friends, family, or service providers without giving out your garage keypad code. You can manage permissions and get access at any time. 5. Security Cameras and Monitoring Some smart garage door systems already have built-in or compatible security cameras. You can monitor deliveries, track movement, or get video alerts when the door opens. This is particularly useful for deterring theft and monitoring package drop-offs. Benefits of Installing a Smart Garage Door Increased Security Smart doors reduce the risk of leaving your garage vulnerable. Alerts, auto-close features, and camera integrations offer multiple layers of protection, which is why more homeowners are turning to providers like Fairway Garage Door for high-security installation options. Greater Convenience You no longer need to carry remotes or worry about forgetting to close the garage. From controlling the door with your phone to setting routines and timers, smart garage doors simplify your day-to-day routine. Energy Efficiency and Home Integration Some smart systems connect with home automation features that optimize energy usage, like keeping the garage closed during peak temperature hours to help maintain indoor comfort levels. Activity Tracking You can view a history of door activity, so you always know when it was opened or closed and by whom. This is useful for parents keeping an eye on teen drivers or for checking if a contractor arrived as scheduled. Is a Smart Garage Door Right for You? If you use your garage as the main entry point to your home or use it for storage, deliveries, or workspace, a smart system is a worthwhile upgrade. It not only adds value to your home but also aligns with modern expectations for automation and security. Smart garage doors are compatible with both new constructions and existing garage systems. If your current opener is functioning well, you can often retrofit it with a smart controller to gain similar features without replacing the entire unit. Choosing the Right System When selecting a smart garage door system, consider: For professional guidance, installation, and product recommendations, many homeowners rely on trusted local experts like Fairway Garage Door Chicago, known for helping clients choose smart systems that meet their daily needs and security expectations. Installation: DIY or Professional? While some smart garage door openers are designed for DIY installation, hiring a professional is recommended for optimal performance and safety. A professional can: Final Thoughts Smart garage door technology is transforming how we interact with one of the most-used entry points in our homes. From increased convenience and security to better control over access and automation, these systems are a modern solution for today’s connected lifestyles. Whether you’re upgrading an older system or building your dream smart home from scratch, a smart garage door is a valuable investment that pays off in convenience and peace of mind. For expert advice and installation designed according to your home, Fairway Garage Door Chicago is ready to help you take the next step into smarter living.
Why Is My Garage Door So Noisy?

A noisy garage door can disrupt your peace and signal underlying issues you shouldn’t ignore. While it’s easy to get used to the creaks and clunks over time, they can indicate wear and tear, loose components, or the need for some straightforward maintenance. Common Causes of Noisy Garage Doors and How to Fix Them Understanding the reasons behind the noise can help you take the right steps to fix it before it turns into a costly repair. Here are some of the most common causes of a noisy garage door, along with practical ways to quiet it down. 1. Lack of Lubrication One of the most frequent culprits behind squeaky or screeching noises is simply dry hardware. The metal components of your garage door system—rollers, hinges, tracks, and springs—need regular lubrication to function smoothly. When these parts grind against each other without enough lubrication, they produce irritating noises and wear out faster. What to do: Apply a silicone-based garage door lubricant to the rollers, hinges, and springs every few months. Be sure to clean off old grease and dirt first. Avoid using all-purpose sprays like WD-40, which are not designed for long-term lubrication. 2. Worn-Out Rollers Rollers help guide your garage door along the tracks. Over time, they can become worn, cracked, or rusted, especially if they’re made of metal. Worn rollers often create a grinding, squealing, or vibrating sound during movement. What to do: Inspect the rollers. If they appear cracked or damaged, replace them. Consider upgrading to nylon rollers, which are quieter and don’t require lubrication as often. If you’re unsure about DIY replacement, a local technician, like those at Fairway Garage Door Chicago, can handle it safely. 3. Loose Nuts, Bolts, or Screws With daily use, the vibration of your garage door can cause the hardware to loosen. Loose components often create rattling or banging noises and can also lead to more serious damage over time. What to do: Use a socket wrench to tighten all bolts, brackets, and screws along the door and its track. Be careful not to overtighten, as that can strip threads or damage metal parts. Regular maintenance checks can keep these issues from recurring. 4. Misaligned Tracks Tracks that are misaligned can cause scraping, rubbing, or grinding sounds. This not only increases noise but can strain the opener and lead to uneven movement. What to do: Check whether the door appears to be rubbing against the tracks or if there’s uneven spacing between the track and the rollers. If the track is visibly warped or loose, it’s best to call a professional. Attempting to force a misaligned track back into place can make the problem worse. 5. Worn or Broken Springs Springs play an important role in lifting and lowering your garage door. If they become worn, stretched, or broken, they can produce a loud bang or creaking noise. A faulty spring also makes the door harder to open and can cause balance issues. What to do: Because garage door springs are under extreme tension, do not attempt to repair or replace them yourself. Contact a trained professional to inspect and replace them if needed. Fairway Garage Door provides safe and efficient spring replacements, especially if your door has become noisier recently. 6. Noisy Garage Door Opener Sometimes the door itself isn’t the problem—it’s the opener. Older chain-driven garage door openers tend to be noisy. Over time, the chain may also loosen, slap against the rail, or make clicking sounds. What to do: Check the chain for slack and adjust it according to the given instructions. If your opener is several years old, it may be time to upgrade to a quieter belt-driven or screw-driven model. Modern openers also come with smart features and enhanced safety functions. 7. Damaged Hinges or Bearings Hinges help your garage door panels to bend as the door moves. If they become rusty or cracked, they can create a popping or squeaking sound. The same goes for bearings in the pulley system, which may start grinding as they wear down. What to do: Visually inspect all hinges and listen for localized noise as the door moves. Replace any visibly damaged or noisy hinges. Lubricate them if they’re intact but dry. If the sound is coming from the pulleys or torsion tube, professional servicing is the safest route. 8. Imbalanced Door If your door is unequal or imbalanced, it can cause jerky movements, loud noises, and even lead to premature wear on the opener. What to do: Disconnect the automatic opener and manually raise the door halfway. If it doesn’t stay in place, the springs may need adjustment. This is a job for a professional, as improper handling can be dangerous. 9. Poor Installation or Low-Quality Materials Lastly, if your garage door is poorly installed or made of thin materials, noise might be amplified. Some older or budget doors lack insulation or proper vibration control, making them noisier. What to do: Insulating your garage door can reduce both noise and energy loss. If the door itself is the source of the noise and it’s near the end of its lifespan, replacement with a higher-quality, insulated model might be the best option. Preventing Noisy Garage Doors in the Future Preventive maintenance is key to keeping your garage door running quietly and efficiently. Here are a few tips from our team: With regular care, your garage door can stay smooth, safe, and quiet for years to come. Final Thoughts A noisy garage door isn’t just irritating—it’s a sign that something might need attention. Thankfully, many causes are easy to diagnose and fix with regular maintenance. Whether it’s lubricating the parts, tightening bolts, or replacing worn-out rollers, staying proactive can prevent larger issues and extend the life of your system. If your garage door continues to make noise even after basic upkeep, don’t hesitate to contact a professional for an inspection. Addressing problems early will save time, money, and frustration—and restore the peace and quiet to your daily routine. For expert service